Unpack.
Remove all items from the travel case.
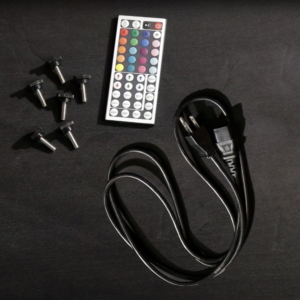
(a) Thumb Bolts (x5)
(b) Power Cord
(c) LED Remote
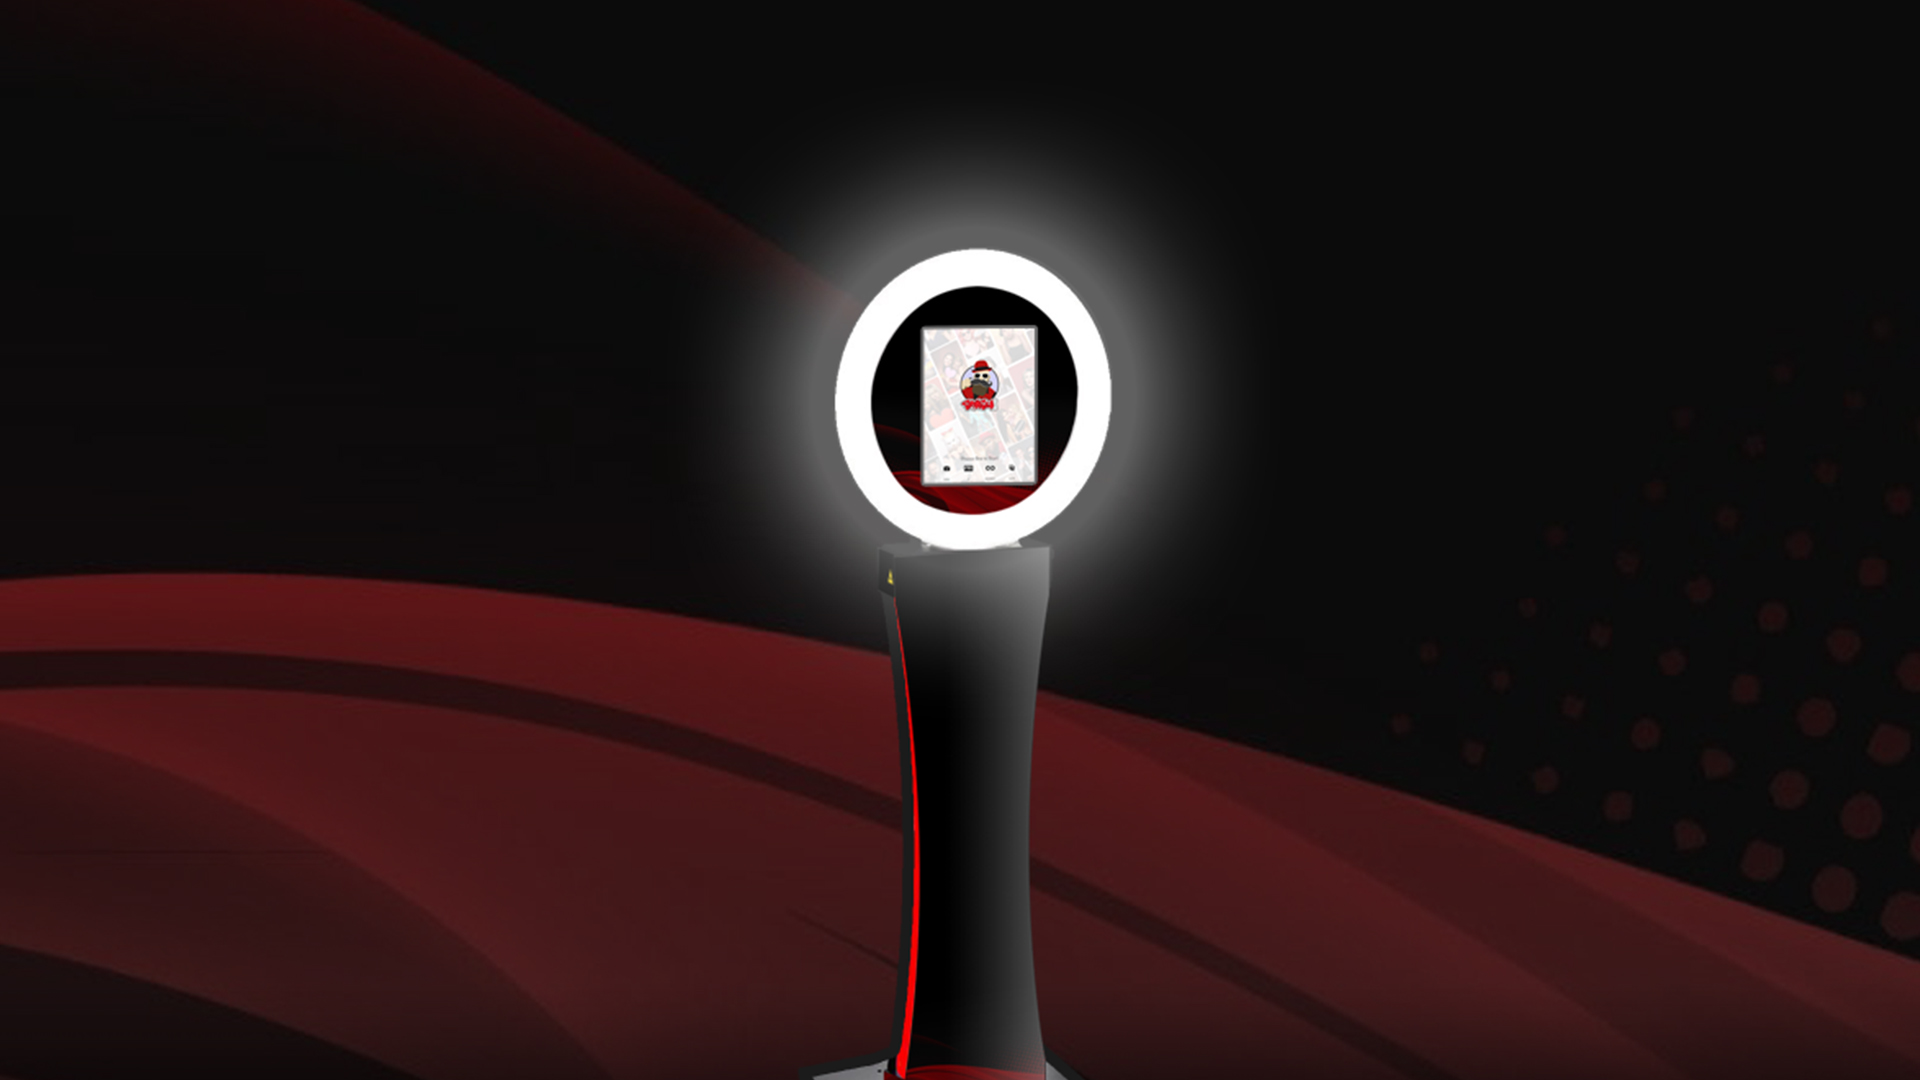
(d) Kiosk Base (about 5 lbs)
(e) Kiosk Tower (about 35 lbs)
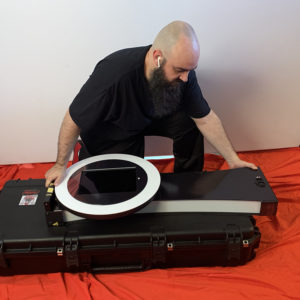
Close the travel case and place the Kiosk Tower on the closed lid with the screen facing up.
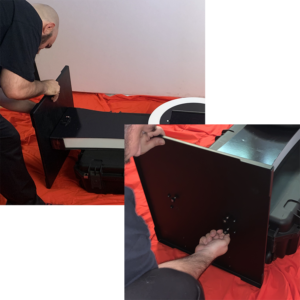
Lean the Kiosk Base against the bottom of the Kiosk Tower and attatch it using 4 Thumb Bolts. Get each Thumb Bolt started before hand tightening each. Don’t over tighten.
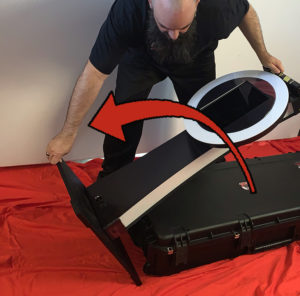
Stand the Kiosk. Carefully guide the kiosk to a standing position by leaning it up and away from the travel case.

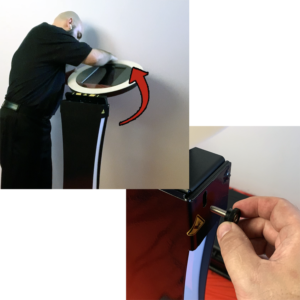
Very carefully rotate the head of the Kiosk Tower on it’s hinge to an upright position. Be careful to not pinch your fingers! Loosely add a Thumb Bolt to either side. Only tighten this if the Kiosk Tower head is loose and will not stay upright.
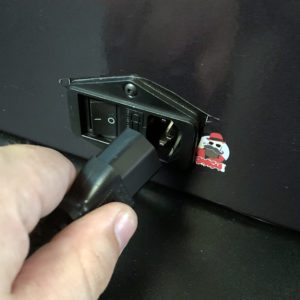
Plug the Power Cord into the back of the Kiosk Tower, then plug it into the wall or extension cord. Always cover the cord with tape or other covering to prevent tripping. Switch the power to on position (O).

Powering on.
Turn the power off, then back on. The kiosk screen should come on for a few seconds.
Before it turns off, touch and hold the on-screen button in the lower right-hand corner of the screen.
When the dialog box; choose "Home".
Powering Off. Touch and hold the on-screen button, from the dialog box, choose “Lock Screen”.
Note: Powering down the kiosk will not turn off the screen. If the kiosk does not have power (unplugged or turned off), the screen’s battery will die and the kiosk will become unusable for at least an hour while charging. To avoid this, be sure the screen is OFF anytime the tower lights are off, or while not in use.
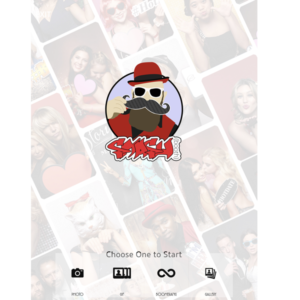
The photo booth is self-guided and very easy to use. Simply tap the experience you would like, Photo, GIF, or Boomerang (varies by event) and follow the on screen instructions. That’s it!
Note: Start with a photo to test your framing and lighting and adjust as needed (light control knob is located in the hole on the back of the Kiosk Tower).
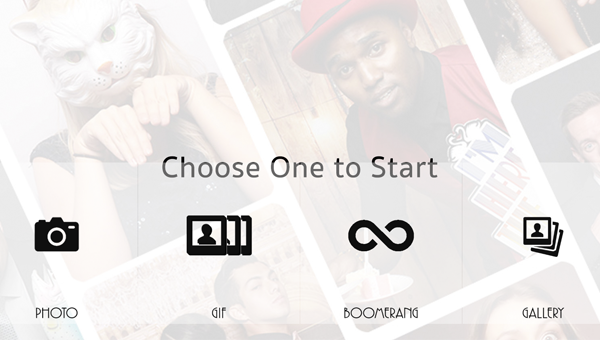
GLOSSARY
| Photo |
Single pose session producing a digital photo.
| GIF |
Three pose session producing a single frame, short slideshow of the 3 poses.
| Boomerang |
A quick burst of photos which are stitched together to produce a short looping video.
| MMS |
Send via text messaging.
Setup: Full
Step A: Unpacking
Step B: Placing the Kiosk
Step C: Attaching the Base
Step D: Stand the Kiosk
Step E: Raise the Head
Step F: Attach the Power Cord
Adjust the Lights
Turn on the Screen
FAQ & Trouble Shooting
There are two ways.
- Using a very small pointed object like a paperclip or earring, press the button located through the hole below the screen. The screen should turn on.
- Switch the kiosk tower's power off (located near the floor on the rear of the tower), then back on. The screen will turn upon momentarily. Before it turns off, touch and hold the on-screen button (located at the bottom right-hand of the screen), until a dialog box opens and choose "Home".
Note: The unit must be plugged in with the main power switched to "ON" anytime the screen is powered on. Otherwise, the screen's battery power will drain and it will require unto an hour to recharge.
To turn off the screen, simply touch and hold the on-screen button (located in the bottom right-hand corner) until a dialog box appears and touch "Lock Screen".
The control knob for the ring light brightness is located on the backside of the kiosk inside the hole in the "neck" area joining the kiosk head to the tower body.
Use the included remote to choose the color of the tower LED light as well as choose from multiple light features.
First, make sure you entered the correct phone number or email address by going to the event gallery, finding your session and resending it.
If it still doesn't arrive, you may need to wait longer. Your session is being sent through our provided network which uses available AT&T LTE cellular data networks. In crowded areas or or areas with poor signal strength the sessions may take several minutes or longer to arrive. In a worse case scenario where no LTE cellular data access is available, all sessions will be queued and sent as soon as access becomes available. In some cases this will not take place until the kiosk is returned to our office. Don't worry, ALL SESSIONS WILL BE SENT OUT.
You may need to tap "Next" in the top right-hand corner of the screen.
Carefully lean the kiosk left or right until the screen orientation shifts to landscape, then slowly bring the kiosk back to a standing position. The screen should adjust again to the correct orientation.

Unpack.
Remove all items from the travel case.
(a) Thumb Bolts (x5)
(b) Power Cord
(c) LED Remote
(d) Kiosk Base (about 5 lbs)
(e) Kiosk Tower (about 35 lbs)

Close the travel case and place the Kiosk Tower on the closed lid with the screen facing up.

Lean the Kiosk Base against the bottom of the Kiosk Tower and attatch it using 4 Thumb Bolts. Get each Thumb Bolt started before hand tightening each. Don’t over tighten.

Stand the Kiosk. Carefully guide the kiosk to a standing position by leaning it up and away from the travel case.


Very carefully rotate the head of the Kiosk Tower on it’s hinge to an upright position. Be careful to not pinch your fingers! Loosely add a Thumb Bolt to either side. Only tighten this if the Kiosk Tower head is loose and will not stay upright.

Plug the Power Cord into the back of the Kiosk Tower, then plug it into the wall or extension cord. Always cover the cord with tape or other covering to prevent tripping. Switch the power to on position (O).

Powering on.
Turn the power off, then back on. The kiosk screen should come on for a few seconds.
Before it turns off, touch and hold the on-screen button in the lower right-hand corner of the screen.
When the dialog box; choose "Home".
Powering Off. Touch and hold the on-screen button, from the dialog box, choose “Lock Screen”.
Note: Powering down the kiosk will not turn off the screen. If the kiosk does not have power (unplugged or turned off), the screen’s battery will die and the kiosk will become unusable for at least an hour while charging. To avoid this, be sure the screen is OFF anytime the tower lights are off, or while not in use.

The photo booth is self-guided and very easy to use. Simply tap the experience you would like, Photo, GIF, or Boomerang (varies by event) and follow the on screen instructions. That’s it!
Note: Start with a photo to test your framing and lighting and adjust as needed (light control knob is located in the hole on the back of the Kiosk Tower).

GLOSSARY
| Photo |
Single pose session producing a digital photo.
| GIF |
Three pose session producing a single frame, short slideshow of the 3 poses.
| Boomerang |
A quick burst of photos which are stitched together to produce a short looping video.
| MMS |
Send via text messaging.
Coming Soon
FAQ & Trouble Shooting
There are two ways.
- Using a very small pointed object like a paperclip or earring, press the button located through the hole below the screen. The screen should turn on.
- Switch the kiosk tower's power off (located near the floor on the rear of the tower), then back on. The screen will turn upon momentarily. Before it turns off, touch and hold the on-screen button (located at the bottom right-hand of the screen), until a dialog box opens and choose "Home".
Note: The unit must be plugged in with the main power switched to "ON" anytime the screen is powered on. Otherwise, the screen's battery power will drain and it will require unto an hour to recharge.
To turn off the screen, simply touch and hold the on-screen button (located in the bottom right-hand corner) until a dialog box appears and touch "Lock Screen".
The control knob for the ring light brightness is located on the backside of the kiosk inside the hole in the "neck" area joining the kiosk head to the tower body.
Use the included remote to choose the color of the tower LED light as well as choose from multiple light features.
First, make sure you entered the correct phone number or email address by going to the event gallery, finding your session and resending it.
If it still doesn't arrive, you may need to wait longer. Your session is being sent through our provided network which uses available AT&T LTE cellular data networks. In crowded areas or or areas with poor signal strength the sessions may take several minutes or longer to arrive. In a worse case scenario where no LTE cellular data access is available, all sessions will be queued and sent as soon as access becomes available. In some cases this will not take place until the kiosk is returned to our office. Don't worry, ALL SESSIONS WILL BE SENT OUT.
You may need to tap "Next" in the top right-hand corner of the screen.
Carefully lean the kiosk left or right until the screen orientation shifts to landscape, then slowly bring the kiosk back to a standing position. The screen should adjust again to the correct orientation.
